
Last Updated on March 30, 2021 by Audrey
As an Amazon associate, I may earn a commission from any qualifying purchases (at no extra cost to you).
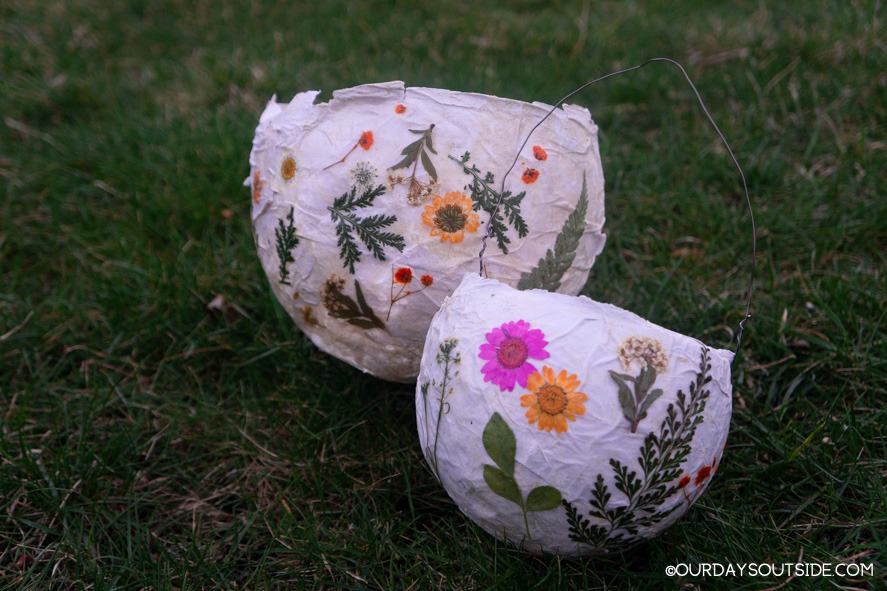
Lately I’ve been on a kick of using pressed flowers for all our nature crafts. These DIY paper lanterns have been on my list for a while. They look so pretty with the delicate pressed nature bits and the soft glow of light inside!
These are great for decorating an indoor or outdoor space! My little guy hung his in his room to use as a nightlight. They would also set the stage beautifully for an outdoor party at twilight or around a campfire. Or, for something extra fun, bring them along for a whimsical a nighttime walk!
Read on to see how to make some pretty DIY paper lanterns of your own!
1. Gather your materials.
Here’s what you’ll need:
- balloons
- tissue paper
- all purpose flour
- bowls
- permanent marker
- mod podge
- pressed flowers (or press your own)
- wire
- hole punch
- pliers

2. Make your paper mache.
To get the shape of these lanterns, blow up your balloons to whatever size you’d like them to be when they’re finished. We tried some large and some small, but my favorites ones ended up being on the smaller side.
Place the balloons in some bowls with the knot side facing down. This will help hold them in place as you work. If you’d like, draw a line around the balloon for guidance as to what area your paper mache will need to cover.
Next, you’ll cover half of the balloons with paper mache to create the base of these DIY paper lanterns. Making paper mache is fairly simple, although you may need to play around with the ratio of flour to water. I used a 1:1 ratio and did 1 cup of flour to 1 cup of water. If you try this out and it seems too thick, you can always add more water until you get a consistency that feels right.
3. Cover your balloons.
Tear or cut your tissue paper into strips. Dip them one at a time into the bowl of paper mache, wipe off excess with your fingers, and begin to cover your balloons with the strips. For these DIY paper lanterns to be strong when they’re finished, try to criss cross the strips and make them go in different directions.

Aim to cover the entire portion with at least three layers of tissue paper and paper mache. I had to spot check my little guy’s balloon to cover a few spots he missed.
And make sure not to overlook the area that will make up the rim of the lanterns. This needs to be extra strong as the hole and wire for the lanterns will be going here.
My little guy absolutely loved this part as he was allowed to get super messy and dip his hands into the “goop”! And, of course, I would highly recommend covering your work space with brown paper bags or old newspapers before beginning.

4. Let dry.
After you’ve finished covering your balloons, it’s time to let these dry. For us, this took a good twenty-four hours for them to dry out completely, so plan on this being a two day project. Leave them in the bowls so that no part of the wet paper strips are touching a surface while they dry.
5. Decorate!
Once they’re dry, it’s time to decorate! But first, take a needle and pop the balloon! Now you have your lantern to work with.

Paint on a thick layer of mod podge, then stick your pieces of nature on top. Once they’re in place, paint another layer of mod podge over top to securely hold them in place.


For extra strength, make sure to paint a layer of mod podge along the entire surface of the lanterns. For this part, we propped these over top of our water bottles to make decorating easier. Once you’re done with this part, your DIY paper lanterns are almost finished!
6. Add the handle.
Punch a hole on opposite sides of your lantern. Make sure to leave a little bit of space between the hole and the top of the lantern so that it doesn’t rip too easily. To strengthen, reinforce by adding even more mod podge around the holes on the inside and out.
Once that’s dry, cut a piece of wire with your pliers to whatever length you prefer and wrap each end through the holes. Now you have a handle so that you can hang these or carry them on a walk! Place an LED tealight inside, and they’re ready to go!
Now you can decide how you’d like to enjoy your beautiful DIY paper lanterns! Whether you place them inside or out, they’re sure to add a magical touch!
Looking for more nature crafts? Check out these pressed flower necklaces!
PS – Know someone that would like this blog? Please forward it to them!


I like the helpful info you provide in your articles. I’ll bookmark your blog and check again here frequently. I am quite sure I’ll learn lots of new stuff right here! Best of luck for the next!