
Last Updated on April 18, 2026 by Audrey
This post contains affiliate links.
Looking for a fun and easy Easter craft your kids will actually want to wear? This bunny ears craft is the perfect mix of creative play and holiday excitement. Whether you’re getting ready for an egg hunt, a school party, or just a cozy afternoon at home, this simple project lets kids use their imagination while making something adorable. (My daughter even asked for a bunny rabbit tail to go with the ears. 😄)
My daughter has been wearing hers nonstop around the house and she looked like an adorable little bunny while searching for her easter eggs out in the yard! Even my toddler is tolerating his because he sees his big sister wearing them and having fun. With just a few basic supplies and a little hands-on help, you’ll have a cute set of bunny ears in no time—perfect for hopping into the Easter spirit.
Get started on this bunny ears craft in no time. Here’s what you’ll need:
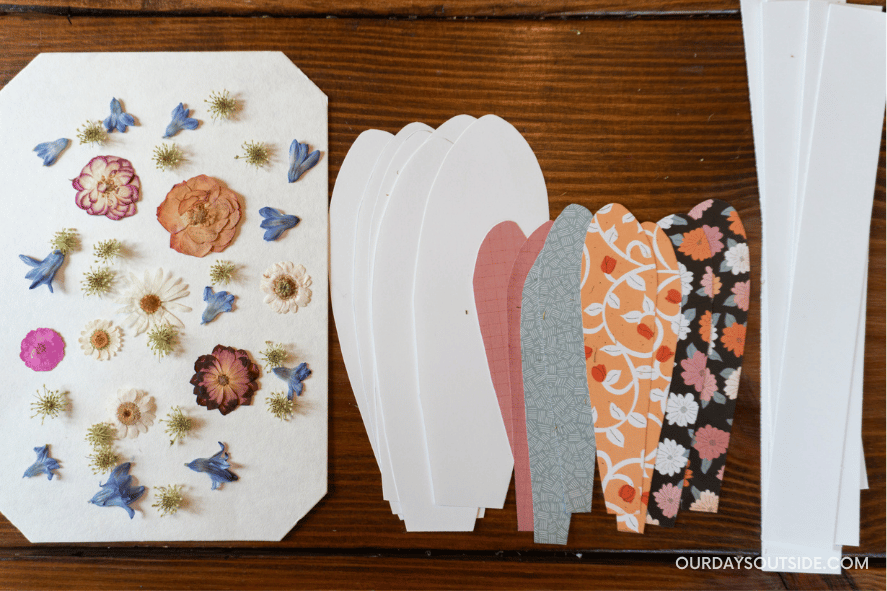
Materials:
- Cardstock
- Colorful patterned paper
- Pressed flowers
- Glue sticks
- Double sided tape
- Stapler
- Optional:
- Hole punch
- Ribbon/cord
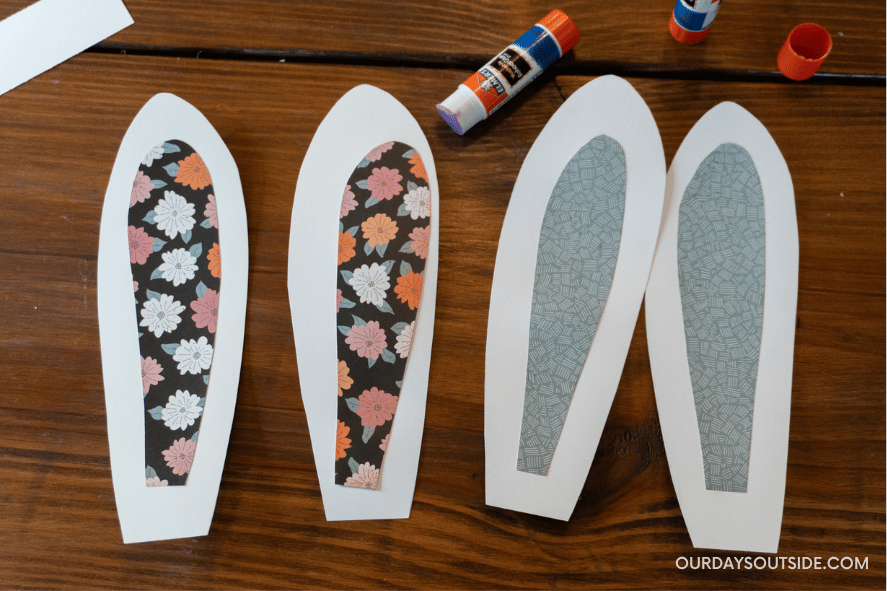
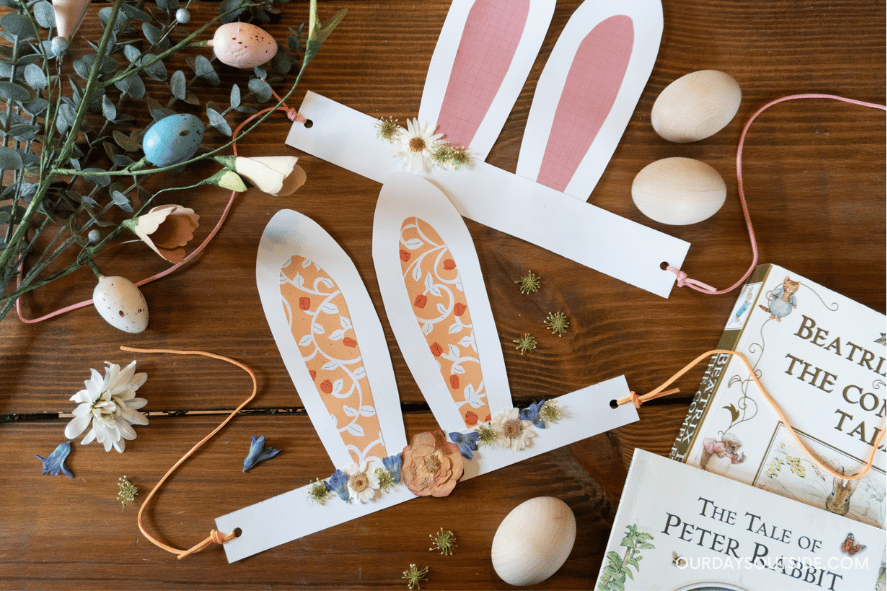
1. Make the ears.
Cut out bunny shaped ears from the white cardstock. If you don’t want to freehand it, find and print out a bunny ears template to trace. Then, cut out a smaller shape from the patterned paper to fit inside the larger white ears. There are so many pretty spring and floral patterned paper options out there and I personally love this little touch for the ears. Next, have your kids glue the colorful paper on top.
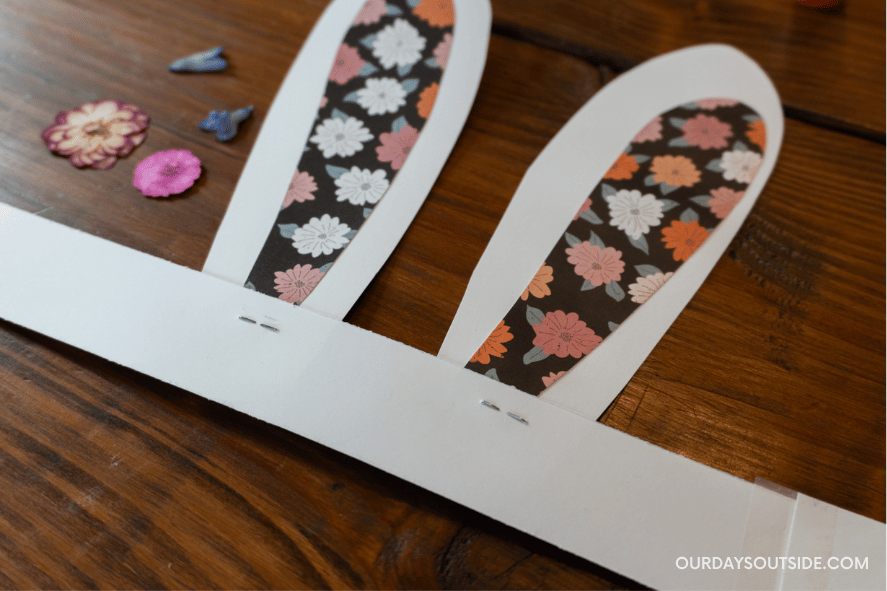
2. Make and attach the band.
Cut some narrow strips out of the cardstock to use as the band. If you’re planning on using cord to tie off your band, feel free to just use one strip. If you want the band to circle all the way around your child’s head, gather the amount of strips needed to reach all the way around, plus a little extra just in case.
Glue the ears onto the back of the band and staple each one for extra support. (Put the staples near the top so they can be hidden by the flowers in the next step.)
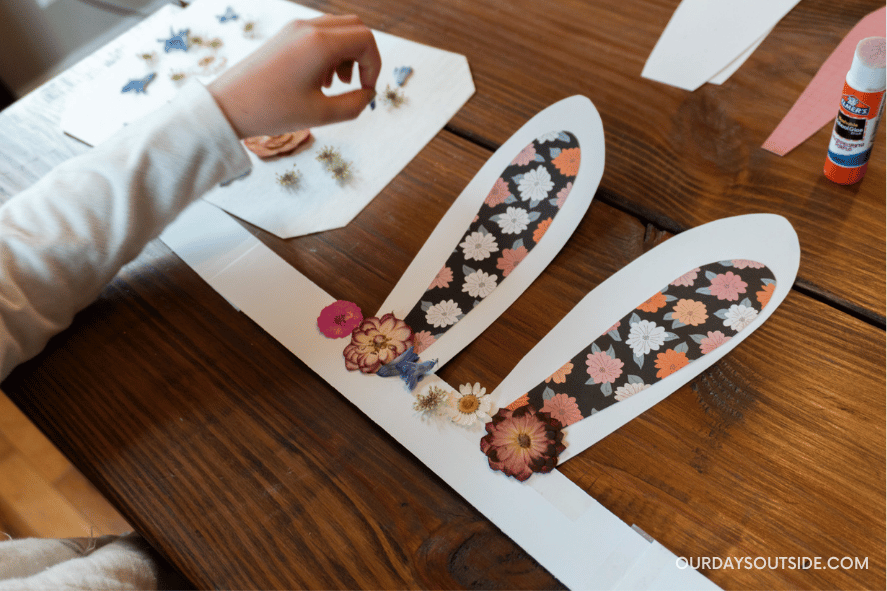
3. Decorate headband with flowers.
This next step for your bunny ears craft is the most fun! Add some strips of double sided tape to the band and let your kids stick on some pressed flowers to decorate their bunny ears craft. This gives the appearance of an adorable flower crown on top of the bunny’s head!

4. Measure and close the band.
There are a couple different ways to close off your headband. If you want it to be adjustable, cut a hole into the end of each side and attach some sort of string. We used this colorful suede cord which provides grip so it won’t come untied easily.
The other option is to just have the cardstock headband circle all the way around their head. You can either tape or staple multiple pieces together until you achieve the right size. The benefit of this approach is that it’s easier for kids to put the bands on and take them off on their own.
There you have it! Your kids are ready to hop into all the Easter and spring festivities with their new bunny ears craft!
Looking for more spring crafts and activities for kids? Check out 15 Fun Easter Crafts and Activities for Kids of All Ages or Gorgeous Flower Crafts For Kids.
PS – Know someone that would like this blog? Please forward it to them!


